

How to Mount Your Wall Headboard Like a Pro
Learn how to install your wall-mounted headboard like a pro! Follow our step-by-step guide, from preparation to final touches, for a secure and stylish result.
Installation Guide: How to Mount Your Wall Headboard Like a Pro

Just received your stunning headboard and can't wait to transform your bedroom? Excellent choice! A wall-mounted headboard is a smart, modern option that visually enlarges your space and adds a unique design touch.
Thanks to its clever Z-clip fastening system and the complete kit we provide, installation is a breeze. Follow our step-by-step guide for a sturdy, secure, and perfectly straight finish.
Step 1: Preparation - What's in Your Box
Before anything else, open your package and let's check together that you have everything you need. Good preparation is the key to success!
- Your magnificent headboard, with two "Z-clip" brackets already attached to its wooden frame.
- Two (2) additional "Z-clip" brackets to be fixed to your wall.
- A bag with 12 screws and 12 wall plugs, intended for solid walls (concrete, brick).
- A screwdriver to make the job easier.
Tools you will need:
- A tape measure
- A pencil
- A spirit level (essential for a perfectly straight result!)
- A drill (to make holes in the wall)

Step 2: The Crucial Point - Know Your Wall
⚠️ Attention, this is the most important step! Your wall type determines whether the provided wall plugs are suitable.
Do you have a solid wall (concrete, brick, cinder block)? Perfect! The grey wall plugs provided in the kit are designed for this type of wall. You can move on to the next step.
Do you have a hollow wall (plasterboard / drywall)? DO NOT USE the provided plugs. They are not suitable, and the fixture will not be secure. You will need to get specific hollow-wall anchors, such as Molly bolts, available at any DIY or hardware store.
Step 3: Step-by-Step Installation with the Z-Clip System
Our fastening system is simple: a bracket on the headboard interlocks with the one you fix to the wall, like two puzzle pieces. It's strong and invisible!
-
Choose and Mark the Perfect Height.
Place your bed against the wall in its final position. Height: The ideal height depends on your taste and mattress thickness. As a general rule, the base of the headboard should be between 2 and 4 inches (5-10 cm) above the mattress for a harmonious visual effect and to ensure it isn't hidden by pillows.
Pro Tip: Once you've decided on the height, make a light mark on the wall corresponding to the top of the headboard. From this point, use the spirit level to draw a very light horizontal line. This line will serve as your main guide. -
Calculate the Wall Bracket's Position.
Measure the distance from the top of the headboard to the top of the Z-clip on the back. Call this distance (X). On the wall, measure down by (X) from your guideline. This is where the TOP of your wall bracket should align. -
Mark the Drilling Points.
Draw a horizontal line through this mark. Align the wall Z-clip bracket with this line, center it with your bed, and mark the drilling points through the bracket holes. -
Drill and Fasten the Wall Bracket.
Drill holes, insert appropriate plugs, and screw in the Z-clip. The "Z" opening should face up and out, ready to receive the other bracket.

-
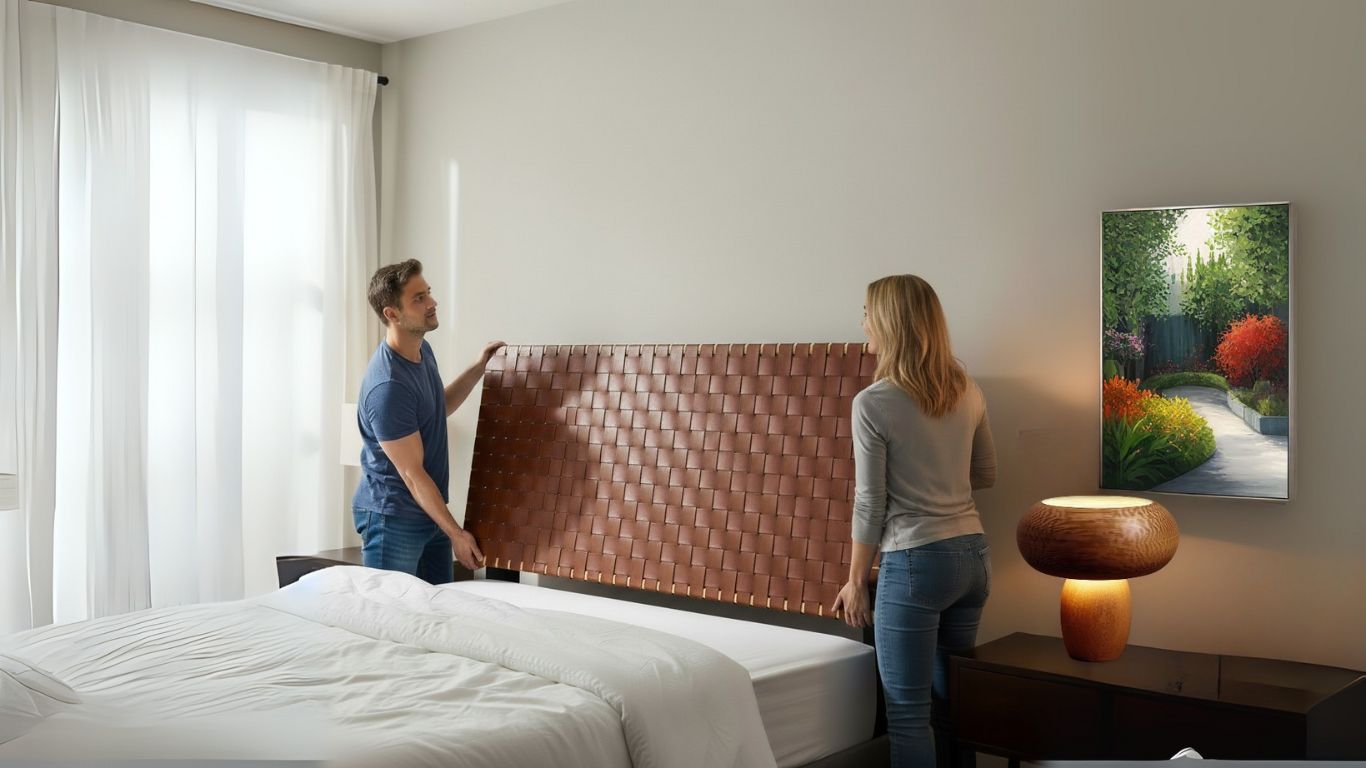
Hang the Headboard.
With two people, lift the headboard above the wall bracket, align the clips, and slide it down until they interlock perfectly. -
Check the Stability.
Press gently to ensure it’s firmly in place.

Conclusion
Congratulations! You have installed your headboard like a true professional. All that's left is to make your bed with your finest linen and enjoy your new bedroom.
Show us the result! Share a photo on Instagram, tagging us with @Artihandmade and using the hashtag #artihandmadestore. We love to see our products come to life in your homes!